

The Problem
Did you ever have a file or folder that you wanted to banish to the depths of the computer netherworld but couldn’t for reasons that only David Hasslehoff understands? That darn file or folder is screaming to be deleted, the client wants it put out of its misery, and although you are trying, you keep getting an error message that says, “This file cannot be deleted because the sun and planets are not aligned this week”.
If this has ever happened to you while at an event or is happening right this minute as you sit banging your head on your desk, we have got just the tool for you…
Unlocker
This little program is pretty cool, and there is no need for me to write 100 paragraphs about the benefits and features because Unlocker has only…..three. Unlocker allows you to move, copy, or delete files or folders that Windows (or some other program) has locked.
In simplicity lies beauty.
For example, let’s say you go to delete a folder, and a message pops up that says, “This folder is locked”..Normally, you are screwed, frustrated, or fired…. but if you have Unlocker installed, you just right-click on the evildoer, choose the Unlocker program and the program will soon be on its way to digital heaven.
Getting the program installed is easy, too; wanna see how easy?
Downloading and Installing Unlocker – Step by Step
All software has to come from somewhere, and for this little project, I am choosing CNET as the download location. I will also include screenshots of each step so that you can follow along while you install.
CNET (part of CBS) is an excellent place to get software tools, including Unlocker, because they scan everything for malware. This simple fact should allow you to sleep a little better knowing that you have downloaded software from a nice, reputable site rather than “Joe’s House of Crappy Software and Porn Toolbars.”
There is a catch however….. even though CNET and Unlocker are both fine and reputable, this does not mean that they will not try and get you to install additional crapware, toolbars, and other junk. This is how many websites and software companies make their money nowadays… Companies pay them to piggyback on their installation.
No complaining, though… you are getting a great piece of software for the low, low price of free, and I am going to walk you through the installation with written directions and pictures.
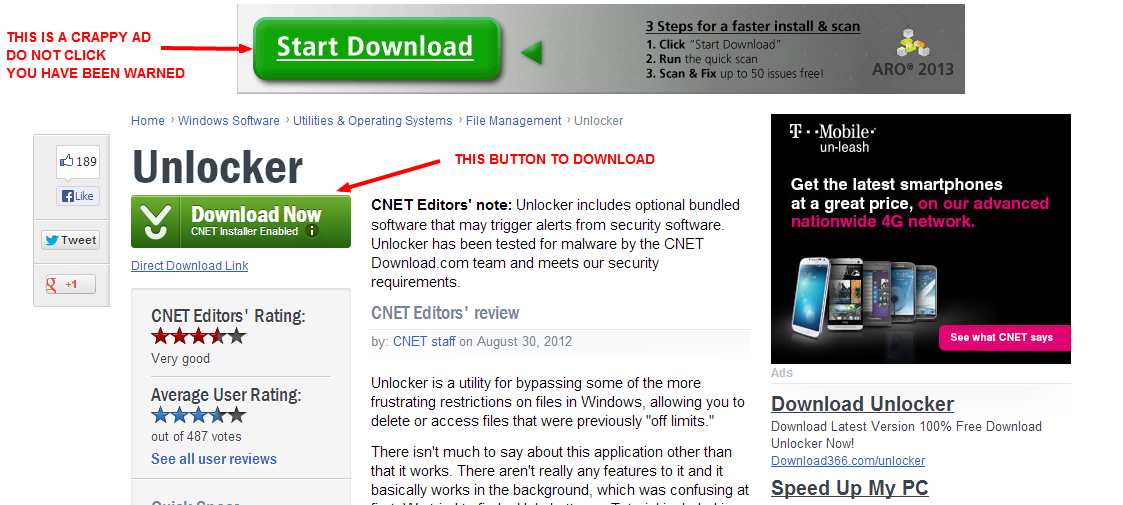
Step 1
- Head over to CNET where you can download the program. Use the correct download button because there can be deceptive ads that try to trick you into downloading other shit.
- If you have never gotten software from CNET, you will first install their installer/downloader. No worries, it is part of the process; you don’t need to do anything extra.
Step 2
- Once downloaded, double-click it (wherever your downloads go). The CNET installer will open.
- Click Next Step

Step 3
- Now, you will choose the installation type.
- Choose custom and uncheck the three boxes that include “install the toolbar” and “set my homepage to valueapps”.

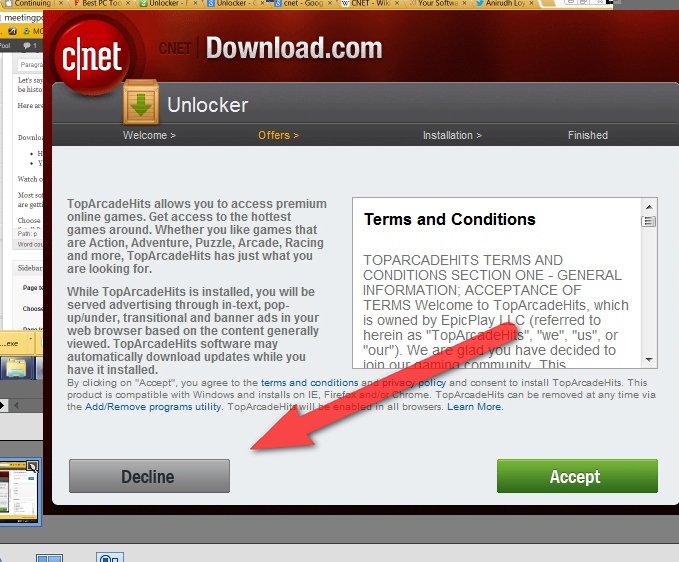
Step 4
- The next page wants you to install “TopArcadeHits.” Choose decline unless you want to relive your youth through crappy old video games.
Step 5
- The next page wants you to install Wajam. Seriously… where do they come up with this crap. Choose decline unless you really want Wajam. Actually, I just went and looked. Apparently, “Wajam is a social search engine that lets users get recommendations from friends by letting them search through public and private data shared on social networking platforms” (From Wikipedia). Whatever…..

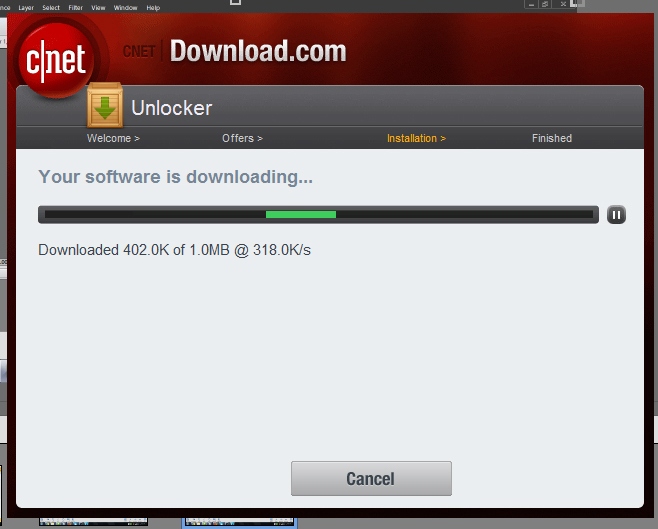
Step 6
- Oh, look! The installer is phoning home and grabbing Unlocker.
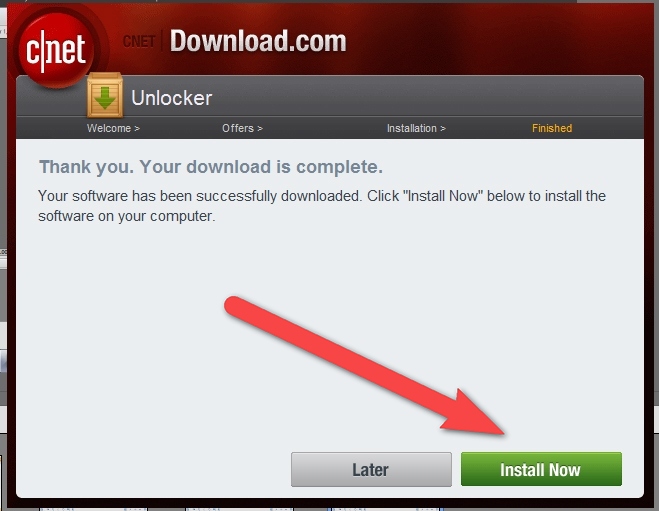
Step 7
- Click install. This is the whole reason for the post.
Step 8
- Step 8 is simply choosing your language.

Step 9
- Ah yes, the familiar installation wizard opens; click next.

Step 10
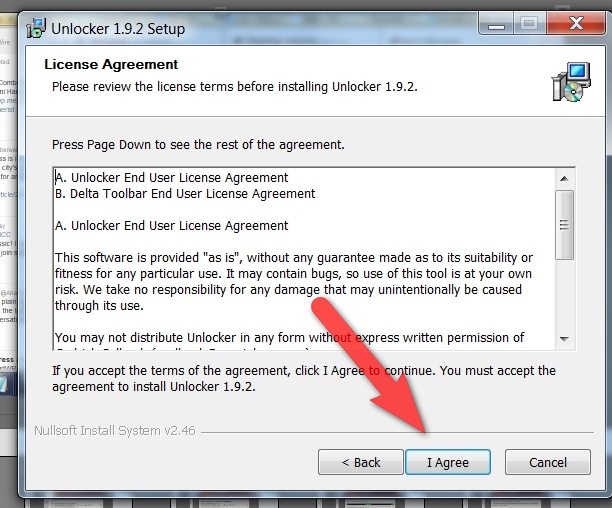
- In this step, you just need to agree to the license terms and conditions.
Step 11
- Next is choosing Unlockers installation type and where they try and get you to install Delta Toolbar. Not really sure what a Delta Toolbar is but I sure as hell do not want it tracking my internet moves while it lives in my browser. My internet world has been good without it for this long, and I am sure that it will be fine moving forward.
- You want to choose advanced and uncheck all of the Delta Toolbar stuff
- Click next.

Step 12
- Next choose the program file location. For most people, the default is fine.

Step 13
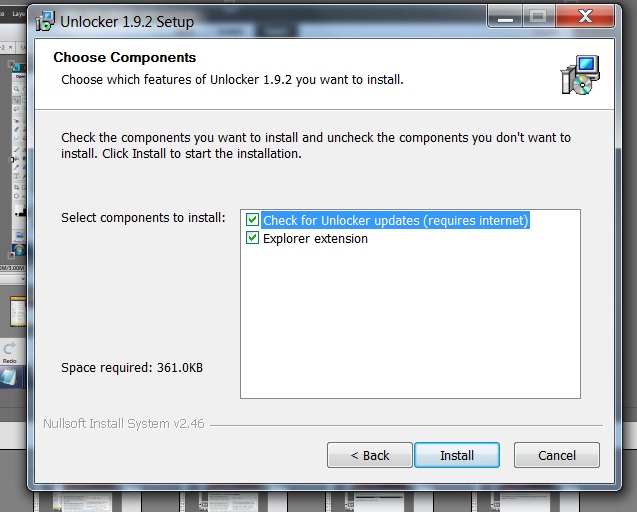
- Next will select the components to install. Both are fine.
Step 14
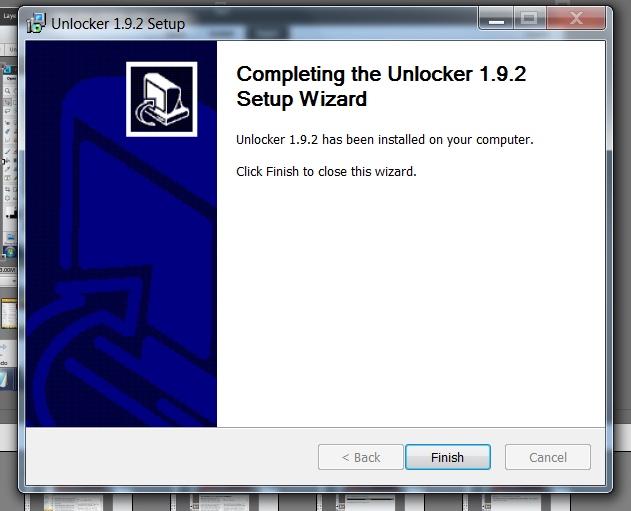
- Click finish and you are done!
Now….Go and delete something with the confidence of knowing nothing can stop you!!! Aaaaaaand….use this power wisely Sparkles, sometimes warnings are actually warnings, not just annoyances.
Unlocker is for Windows only, no Mac.
Unlocker at a Glance:
- Version: 1.9.2
- File size: 1.03MB
- Price: Free
- Operating system: Windows 2000/XP/2003/Vista/7
